Whenever you start a new hobby or activity, there are certain long-term goals that you consciously or unconsciously set for yourself. When I started working with cakes, I knew that at some point I wanted to learn how to work with fondant. It was certainly not an immediate goal, but one I knew I would come to eventually.
When a former co-worker and current mommy-friend contacted me about making a Mickey Mouse cake for her son, my Pinterest research revealed a whole bunch of impressive, beautiful cakes... all covered in fondant. The ones decorated with just buttercream frosting looked decent, but I knew deep down that if I was going to make this cake, it would have to be with fondant. I gave myself one week to experiment and learn the basics of working with fondant.
First, I made a little 6" cake and practiced with covering it in fondant.
I was very pleased with how this first attempt turned out - it was a little uneven around the bottom, but the top and sides didn't look too bad at all. Several practice cakes later, and I was ready to get started on the Mickey Mouse cake.
Above you can see the bottom 9" round red tier and the top 6" semicircle black tier. One of the biggest issues I had with this cake was the rippling/bulging on the sides of the round tiers. You can clearly see the different layers inside the red tier. Was the fondant so heavy on top that it was squeezing the icing out from between the layers? Were there gaps between the layers that the fondant settled into? Still not sure. More research is in order.
Once all three tiers were made, I used wooden skewers to stack them and keep them in place (since making this cake, I've learned that there are even better materials to use for stabilizing and supporting cake layers which work much better than wooden skewers - thick milkshake straws! A very experienced, very sweet cake maker shared this tip with me just hours after I finished assembling the cake tiers. I'm looking forward to trying out this method on my next multi-tier cake). See how sketchy the bottoms of the tiers look at the moment? I wanted to find some way to hide those rough bottom edges.
The experienced cake maker I mentioned earlier also gave me some great advice on molding fondant (like for the Mickey ears): mix some tylose powder into your fondant to make it a bit more firm and sturdy. These Mickey ears would never have stayed upright if I had made them using the same fondant that is covering the cake. Tylose powder saved the day!
To hide the rough bottom edges, I rolled out some thin ropes of fondant and made a little border around the bottom of each tier. They weren't completely even, but after about 18 attempts, I decided that it was as good as it was going to get. I also cut out some white fondant buttons and made a red fondant bow (again, with the tylose powder).
Finally, the big white fondant "4" completes this birthday cake for a very sweet little 4 year old. I can't tell you how much fun I had making this cake and beginning the process of working with fondant! What sort of cake should I try next? :)
Wednesday, July 26, 2017
Monday, July 17, 2017
Tea and Cookies
I've had the pleasure of making cookies for my friend Alyson Powell on several occasions. These were a fun opportunity to try out a couple of new cookie cutters and designs!
Saturday, July 15, 2017
¡Feliz cumpleaños!
It's been a minute since my last cake, so I was very excited when my sweet friend Keyri asked if I could make a birthday cake for her little brother's first birthday.
While I have decorated several cakes before with the ombre look, this is the first one where I attempted to make the crumb coat (the icing layer underneath the decoration) also ombre. It's good to do this in case some of the crumb coat is visible through the decoration.
One of my eventual goals is to do a perfectly smooth and seamless crumb coat like I see on YouTube tutorials... but clearly that day isn't here yet. Still looks pretty good, though!
Friday, June 30, 2017
Behind the Scenes
I gotta tell you, I am having so much fun with this bakery business! Every new cookie or cake brings a new challenge or a new technique. I've had a few people ask about the ingredients of my sugar cookies and how to get the shapes nice and crisp, so that they don't spread out as they bake. While I'm working on a "pastel de cumpleaños" for a very special little 1-year-old, I figured I would give you a sneak peek at the process for making the cookie dough I use.
Yep, here it is - the recipe for my sugar cookies! I didn't come up with it myself (definitely borrowed it off of a website) so I don't feel any special claim to it. The only deviation that I usually take from this recipe is to cream the butter and sugar for less than 5 minutes. I've gotten to the point where I can kind of tell when it's ready... sometimes that takes 5 minutes, but often less.
Here's all the "scratch." This was before I got my nice pretty flour and sugar containers :P
And here's my girl... my KitchenAid mixer. I love this thing. It's definitely the best-cared-for item in our kitchen. Since I'm a Doctor Who fan, I've been meaning to get a Tardis-themed decal for it from Etsy... but I digress.
The kiddo likes to help Mama with the cookies!
I love using my clear plastic splash guard/funnel thing (technical term!) on my KitchenAid mixer when spooning in the dry ingredients. Otherwise, my kitchen would look like there was a recent snowfall of flour.
This recipe typically makes about 3 dozen medium-sized cookies, so I usually split the dough into three mounds and wrap them separately in plastic wrap. After that, they either go in the fridge or the freezer. If I'm going to use the dough that day, I let them chill in the fridge for about an hour and a half. If I'll use it in the next several days, it can hang out in the fridge (out of the way of little toddler hands, of course). Any longer than that and it can hibernate in the freezer for up to three months (I'm pretty sure it would be good for up to six months in the freezer, but I don't think I could bring myself to wait that long to make a batch of cookies!)
And that about it, folks. Perhaps if there's interest, I'll also share my recipe and process for royal icing, but at the moment I smell a wonderful Gibberish Cake ready to come out of the oven. I'm about to have a very happy husband!
See you later!
Friday, June 23, 2017
Brush Embroidery Flowers
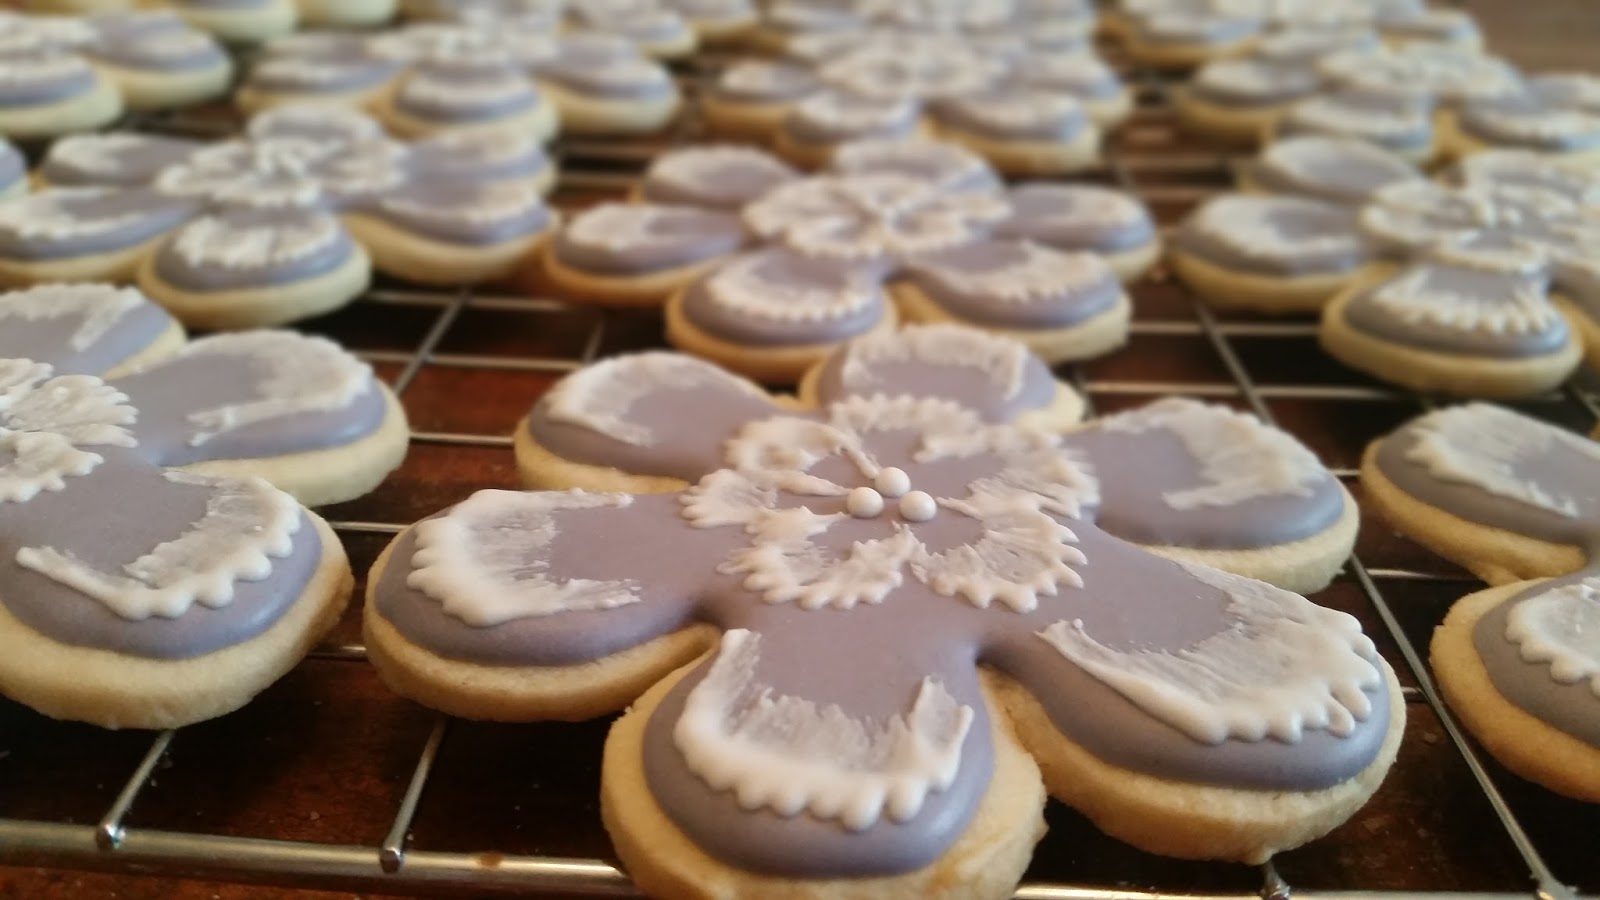
At the same time as I was decorating the ice cream cookies, these beautiful flower cookies were baking in the oven. This is one of the largest batches of cookies I've made, which (at the moment) is really my absolute maximum - 50 cookies. When it takes 10 minutes to bake a sheet, and you can only fit 5-6 cookies on a sheet at a time, and you have a toddler crawling around underneath you... it tends to take a while. However, once they were baked and I was able to start decorating, I had the BEST time working on some more brush embroidery! I hoped that I'd get another opportunity to practice this technique :)
The technique involves piping a squiggly line, then using a squared-off brush to drag some of the icing down and away. In this situation, the icing dries very quickly, so you can't take too long to use your brush. Below, you can see a flower with just the purple icing before I've done the brush embroidery.
Here are all 50 cookies... whew! Some of them are a slightly different shade of purple, because I made a second batch of purple icing and only had a tiny drop of blue left, so they're more of a pink-shaded purple.
Tuesday, June 20, 2017
Ice Cream Cookies
What a busy weekend! While we were getting ready to go on our first vacation with our toddler, I was working on a couple of different, fun cookie orders. These ice cream themed cookies are for a first birthday party this coming weekend - don't they look cute with the sprinkles?
Sunday, June 11, 2017
Subscribe to:
Posts (Atom)